|
|
|
|
|
|
|
|
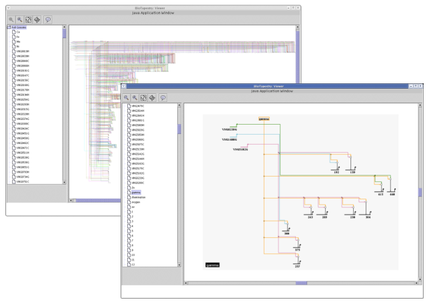
Note: This version of FAQ Answers: Navigation shows reduced-size screen shots. You can click on any image and see the full-size image in a separate window. To get the version with full-size images, go here.
Most zooming options are available using buttons on the toolbar (see below). From left to right, there are buttons for: zooming out a step, zooming in a step, zooming to show just the selected items (so you need to have selected something to activate this), zooming to bound the entire current model, and zooming to bound all the models in the hierarchy. (The last option sets the zoom level so that you can select any model in the hierarchy and see all of that model without needing to change the zoom level.)
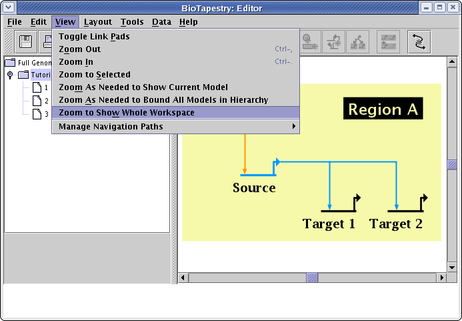
You can also zoom to show the full workspace, but this option is only available by selecting View->Zoom to Show Whole Workspace from the main menu (note all the other options are also available from the View menu):
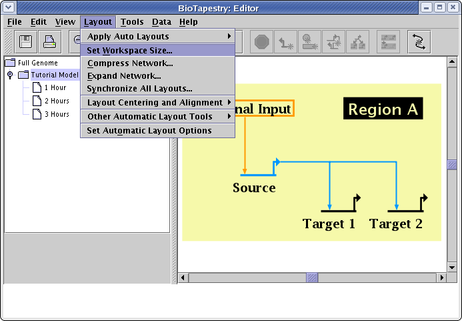
In BioTapestry version 1, the workspace size was fixed. Now you can set the workspace size as needed up to very large values (though the aspect ratio is fixed to 4:3). When importing networks from CSV or SIF files, the software scales the size automatically, but if you are drawing the network manually, just select Layout->Set Workspace Size... from the main menu (see below). In the dialog that pops up, the Fit Workspace Around Models button provides a quick shortcut.
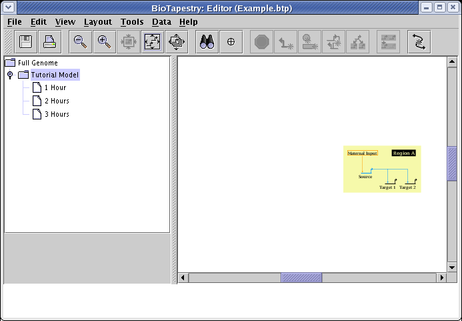
You may encounter a situation where you try to zoom to the current model, but it is not centered:
This may be caused by empty model description strings (i.e. date, attribution, and key text), since the model bounds include those strings. From the main menu, select Data->Edit Model Description Data:
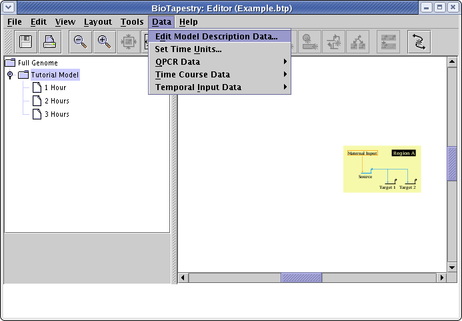
In the dialog that pops up, enter text into all three fields and click OK. If any of the strings appear in the view far away from the network, drag them back with the mouse. Then repeat the above step to remove unwanted description strings.
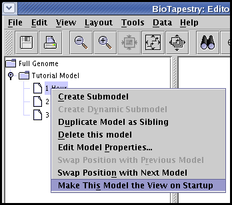
When you load in a file, the first view to show up may not be what you want. This can be particularly important if you are deploying your model on the web using the BioTapestry Viewer. You can set this by right-clicking on the preferred model in the left-hand navigation panel, then selecting Make This Model the View on Startup:
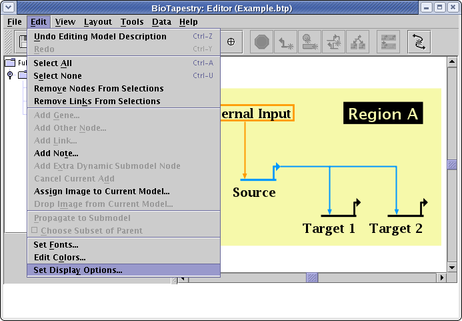
When you load in a file, you might want to have the zoom level set to show the first model as large as possible, or you might want the zoom preset so all the models in the whole hierarchy can be viewed at a single preset zoom level. This can be particularly important if you are deploying your model on the web using the BioTapestry Viewer. You can specify this zoom setting by first selecting Edit->Set Display Options:
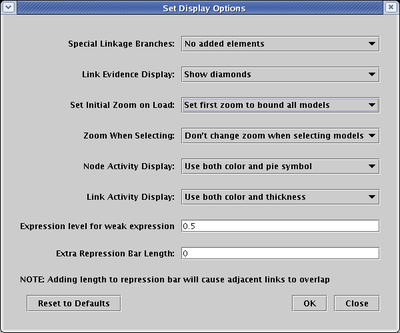
In the Set Display Options dialog, specify the desired option for Set Initial Zoom on Load:
Different applications require different zoom behavior when the user moves between submodels in the hierarchy. For example, if each submodel in the hierarchy is a significantly different size from the other submodels, you want to automatically zoom into each submodel when it is selected:
In other cases, you might want to be sure the exact same zoom level is maintained as you move between models. To set this behavior, select Edit->Set Display Options:
In the Set Display Options dialog, specify the desired option for Zoom When Selecting:

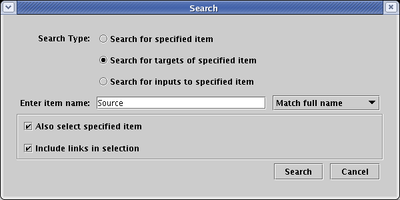
The search function is available by clicking on the Search button on the toolbar:
You enter the name of a node in Enter item name field; you can choose either to Match full name (as shown below), or Match part of name. Furthermore, instead of finding the specified item, you can choose instead to find all the targets or all the sources. In those cases, you also have the option of selecting the links and/or the specified items. Note that if you choose to select all these eleemtns, it provides a quick way of propagating the resulting source/target subnetwork from a top-level root network to a top-level instance model.
Following the search, the program automatically zooms into the selected items.
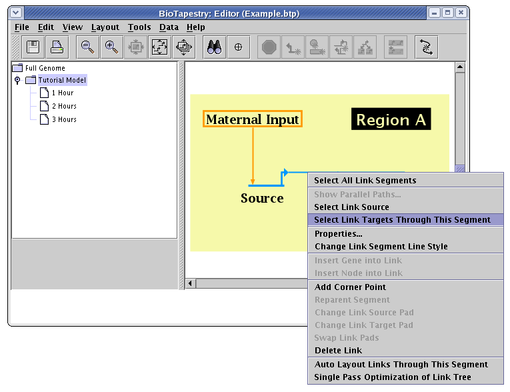
A related, link-centered search technique is available by right-clicking on a link segment. From the pop-up menu, you can choose to select and zoom to the link source node, or alternately to select all targets through the given link segment and zoom to them. From the menu, either choose Select Link Source or Select Link Targets Through This Segment (shown below):
![]() To select a node or gene, just click on it. You can also
click on the node name. In the case of genes, the selection regions are shown here in orange:
To select a node or gene, just click on it. You can also
click on the node name. In the case of genes, the selection regions are shown here in orange:

![]() To select a segment of a link, just click on it. If you
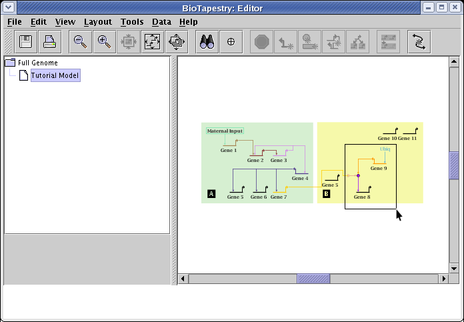
want to select the entire link tree, right-click on the segment, and select Select All Link Segments from the pop-up menu.
To select a segment of a link, just click on it. If you
want to select the entire link tree, right-click on the segment, and select Select All Link Segments from the pop-up menu.
![]() If you want to add additional elements to the current selection, click
on the item while holding down the Shift key.
If you want to add additional elements to the current selection, click
on the item while holding down the Shift key.
![]() If you want to select a block of network elements at once, click in an
unoccupied location (it's OK to be in a region), drag the mouse to create a rubber-band box, and release the mouse button
to select all the nodes and fully contained link segments:
If you want to select a block of network elements at once, click in an
unoccupied location (it's OK to be in a region), drag the mouse to create a rubber-band box, and release the mouse button
to select all the nodes and fully contained link segments:
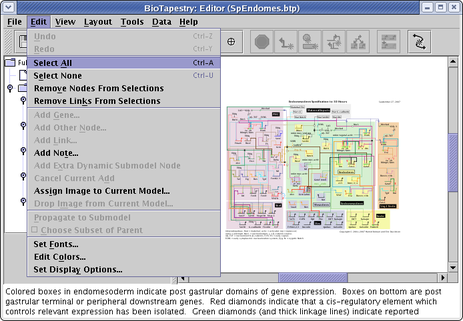
![]() Finally, there are four selection options available from the
Edit menu: Select All, Select None, Remove Nodes From Selections, and Remove Links From Selections:
Finally, there are four selection options available from the
Edit menu: Select All, Select None, Remove Nodes From Selections, and Remove Links From Selections:
Yes, you can specify a series of models in the hierarchy as a path, with each model as a stop on the path. This topic is covered in the mini-tutorial on Creating and Using Paths.